Showing posts with label Grimdark. Show all posts

Saturday, October 21, 2017

One of Our Inspectors is Missing - a Pulp Alley day

Nobody likes an Inspector-General. Snooping, officious pedants from the central Imperium. Sniffing out the shadowy alliances and difficult compromises that are an everyday part of life out here in Hathor Sector.
Nobody likes an Inspector-General, but up until now nobody has killed one. But this time, Inspector-General Hydaspes Owen is missing, presumed dead. Everyone in the Sector would be quite happy with that, if the central Imperium hadn’t threatened to send a task force to tear the Sector to pieces as a punishment. The only way to stop the task force is to present them with the guilty party. Who killed the Inspector? How did they do it? Why?

On the weekend I ran a Pulp Alley games day. The concept for the day was developed by Major Guiscard over at The Governor General of Sector Six and happily borrowed by me (with the good Major's encouragement and advice).

The games are stitched together using the ideas from the boardgame Cluedo. The player have to discover who killed the Inspector-General, why they killed him, and how they did it. 
One card from each of the categories is removed at the of the campaign and placed in a sealed envelope. This is the combination the players are looking for.

After each game, the players are shown one clue card for each minor plot point they take, and three clue cards for the major plot point. At this point, the players are able to propose a theory about the murder: one suspect, one motive, one cause of death. Any other player can disprove the theory if they have seen one of the cards mentioned. Whoever does this is able to draw a bonus reward card and get the benefits.

At any point a player can make an accusation: again, suspect, motive and cause of death. If they are right, they win the game. If they're wrong, that's their one chance. They continue to play, but can't make any more accusations.

We had six players for the first two games,and two more joined in after that. At the end of two games, two players made incorrect accusations. The winner came through after just three games: he won every game by taking the major and two minor plot points every time!

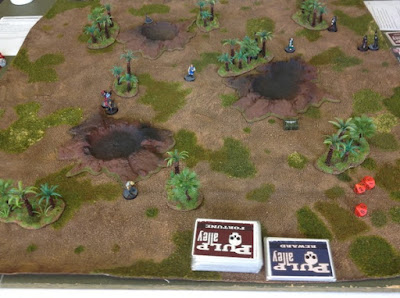
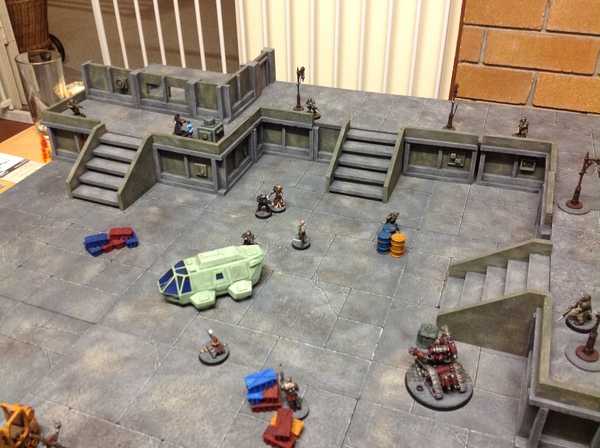
Anyway, pictures! Not a lot of quantity or quality, I'm afraid. I was running around madly for most of the day. There were four locations to explore: the spaceport.
The battlefield.
The Imperial outpost.
The research station.
Oh, one more positive. We had a few visitors to the club to play 40k. One of them came over to see what we were up to and I ran him through three turns of Pulp Alley. He went straight back to his 40k army and was figuring out what kind of Leagues he could come up with!

Monday, October 16, 2017

Peregrine - ???

Thankfully my updates on the Peregrine have been healthily outstripped by my work on it. It made it's debut in a Pulp Alley day at my club a week ago. Before I post up about that I thought I should stick up a few shots of the Peregrine.
It's far from finished: I still have most of the interior to go. But it looks good enough from the outside! 
The exterior was spray painted grey, then I sponged on the white paint. It could probably do with some weathering, but I'm a bit afraid I'll make a mess of it. I might try it on the underside first.

Thursday, August 17, 2017

Come Fly with Me - a Pulp Alley game

Mark and I have started playing a 40k version of Pulp Alley's Perilous Island campaign. I neglected to taking any photos during the first game, but here's game two.

Two leagues are intent on tracking down the Rogue Trader Marcion Darrow. Their best lead is the Rogue Trader's reliquarian, Johann Tzel. A routine stopover turns bad when the spaceport is threatened by a rebel insurrection. There is one last shuttle out. Will Commissar Burns get away with Tzel, or will the Admech team keep them on the ground?
Commissar Burns and his crew must grab tickets from the ticket machine near the guard in the blue shirt. Then they'll grab Tzel and head for the shuttle.
The Admech crew need to rifle through the white crate and find a package. Once they have this, they can grab a mechanic who'll gently disable the shuttle for them!
The spaceport is under guard because of the threat of the insurrection. Any character who engages the enemy will be targeted by the guards (an extreme peril each activation).

Commissar Burns makes polite inquiries about tickets.
The response is prompt, and his team spot the reliquarian, Tzel.
The techpriest is having more trouble trying to jemmy the crate open. Once he does prise it open, nothing! It's actually the generator they need (curse those red herring cards!)
Burns' men move out to grab Tzel and secure the shuttle.
The admech scout maneuvers to defy the security and get a shot in.
Every lasgun in the area reduces him to a smouldering corpse.
Meanwhile, Tzel takes some persuading to tag along with the Commissar's crew.
The mechanic finally shows up, but it is too late to get to her and to the shuttle, so the Admech team begin to move in on their opponents. An unfortunate accidental bump (although the security guards don't see it that way).
The Admech team drop all pretence of politeness.
The techpriest wades in with his great axe.
For all their violence, the Admech are unable to prevent the commisar hustling Tzel to the shuttle.
Just open the door and they're away. The simplest of rolls - one 4+ needed from 4d6.

I'll remember that game for a long time! (With glee, I was the Admech!) Even before the end, this was a great scenario. The penalties for combat meant you had to think really carefully about your actions, and when to pull the trigger. Mark managed to avoid making any attacks all game (he dodged any incoming attacks). But in the end, his virtue went unrewarded!

Sunday, March 26, 2017

RT Project - Pirates and Pilgrims

Last month I managed to paint just one miniature for my RT project game. Happily, this month has been more productive. Here's the first four figures. First off, a couple of pirates.
The guy on the right is a genestealer cultist with head from the Empire Luminark of Hysh kit. Mr Brown is a Reaper Miniatures Space Henchman. Full of hulking, dim-witted character!
Then there are the pilgrims.
One from Axiom's glorious Colony 87 range, and then a GW flagellant with some alternative bits.
What could they possibly be doing all together on the same table? Stay tuned!

Monday, March 20, 2017

Peregrine - 350

A quick update this time. You make some quick progress when every one of these pillars is eleven pieces!
And a couple of bigger views.
Next time will be much more interesting: most of the roof will be done.

Tuesday, March 14, 2017

Peregrine - 300

Lots more detail stuff this time! The sensor array at the front.
You can also see interior walls and compartments.
Probably the coolest part of the build so far is the toilet! (The blurry bit to the right is the sink.)
Sadly, most of it gets hidden away.

Friday, March 10, 2017

RT Project - Maximum Havoc - a Pulp Alley Game

Phew, life has been busy, so the February game is only going up now. But it was another memorable solo game for the Rogue Trader project. Also, apologies for some blurry photos. I do miss my old compact digital! Anyway, enough chit chat: on with the show.
The Lamenter scouts have discovered a secret chaos base. They must attack and destroy as much much hardware as possible. At the end of each turn, a random number of reinforcements will arrive (the X number on the Fortune cards). In addition, the fire support robot will switch on when the shooting starts, and once it has warmed up, it will enter the fray. (Start of each turn, roll 1d6. Once the total reaches 21, the robot is go.)

The scouts wait for a chance to sneak towards their objectives, but a wandering cultist forces them to get loud.
Clay Moore, the demolitions expert, sets his first charges against the supply crates.
Moore is intercepted as he heads for his next target. Other threats are dealt with in the background.
This guy put up some fight!
But he goes down eventually and Moore presses on.
Back towards the centre of the table, the squad leader has been a bullet magnet as he tries to deal with a number of cultists. He's the first scout to die, nailed by a shotgun blast.
Another target, another explosive.
And this is where things got interesting. Turn 7.
The robot is now operational. As if that wasn't bad enough, the reinforcements for the turn include a cultist flamethrower and a chaos marine! (This is the figure, who in his maiden outing took over thirty shots to take down!)
Moore pulls back and sets off the explosives he's planted so far.
Boom!
Boom!
Boom! All three targets destroyed (but I need to make me some nice smoke).
At this point, the scouts face a decision. They can seek to destroy the easy objectives that remain. They can withdraw rather than risk being destroyed by their powerful opposition. Or they can throw everything they have at most valuable and most difficult target, the robot.

Call those options? There's only one thing to do! The scout sniper is first to the target, hoping he can put a shot into a vulnerable spot.
But the robot stomps closer and it turns out the sniper is the one with the vulnerable spot!
By the way, here's the one guy I managed to paint for this scenario this month, making a late appearance in the game, sneaking along behind the robot!
Moore begins hurling grenades, but he fails to dint man or machine. The next turns see him go down four times, only to drag himself up again and again!
Another scout faces the robot and is taken out.
Finally, Moore decides to charge the robot in the faint hope that he can disable it in hand-to-hand.
He is quickly surrounded. He manages to damage the robot, but this tale ends in tragedy rather than triumph.
A failed mission for the scouts (three objectives destroyed, but four left unharmed. Plus the death of the entire team.) However, another great game with a big swing of fortune when the big guns came on for chaos.